What you need to know before you build your first e-cig coil
You'll never forget what it was like your first time...
So, you just bought your first rebuildable atomizer for your "Advanced PV", and you're wondering how you should go about building your first coil... Excellent. We're here to help show you how to build an effective coil for your RBA. We'll walk you through the steps required to wrap the coil, the appropriate amount of wicking material to use, as well as provide you with tips to avoid common issues encountered by beginners. If you're wondering what an RBA is, an RBA is a rebuildable atomizer which is used to vaporize e-liquid. RBA's are typically used with mechanical mods or variable power devices such as the Vanilla mod from Smok-E Mountain Mech Works, or the Vamo. With that said, lets get to building, shall we?
Some tools you'll need before you start:
- Kanthal Wire
- 1/16" or 14g blunt tip syringe or drill bit.
- A small screwdriver
- Butane or Propane torch with a means to ignite it
- Wicking material such as organic cotton, or Ekowool
- Needle nose pliers or forceps
- Wire cutters, Nail clippers, or really sharp scissors
- Some delicious E-Liquid
- An iron will
Got all that stuff? Great! Lets get move on to building a coil for your electronic cigarette!
-
Cut the length of kanthal required for the build
Cut the kanthal or nichrome wire to an appropriate length to wrap the coil you're looking to build. Usually about 3" will do the trick.
-
 Wrap the kanthal around the drill bit or syringe tip, focusing on keeping the coils close together and touching each other.
This method is called a "micro-coil". There are other methods for wrapping a coil, but in our experience the micro-coil will give you the best vapor production and flavor. If you're wrapping the coil around a drill bit, make sure that you're using an 14 gauge wire equivalent which is roughly 1.5mm thick, or 1/16". This will give you more predictable resistance results when it comes to wrapping future coils. We recommend doing 6 to 7 wraps around a 1/16" drill bit or blunt-tip syringe which should read close to 1ohm on your resistance checker.
-
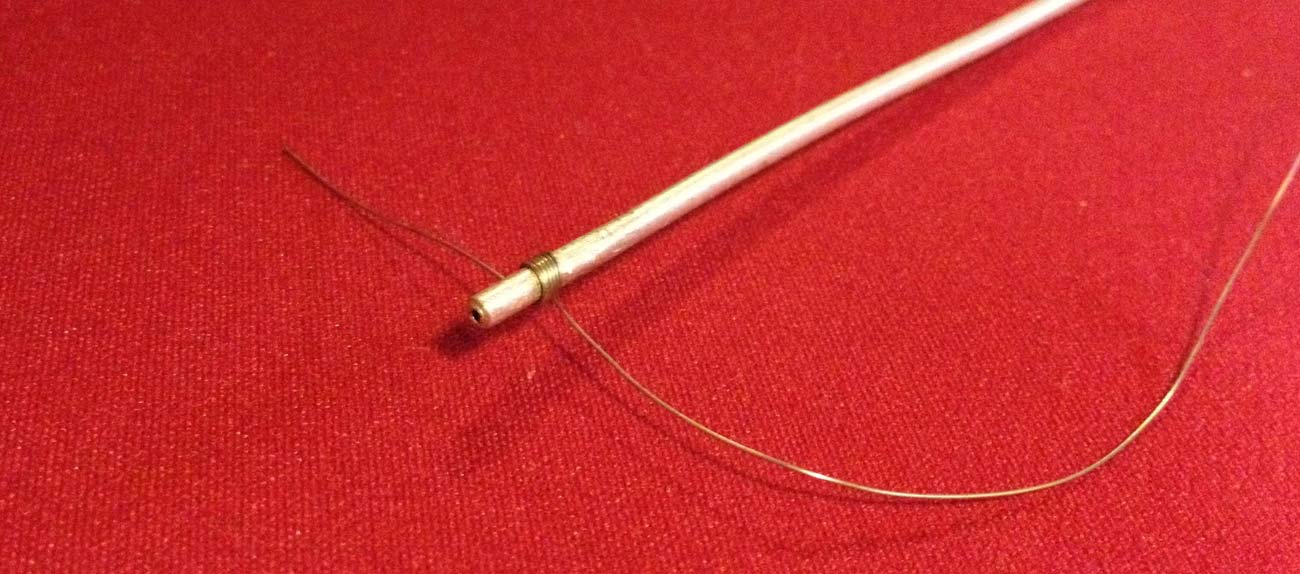
Remove the coil from the drill bit or syringe.
Be gentle. Your coils must remain touching.
-
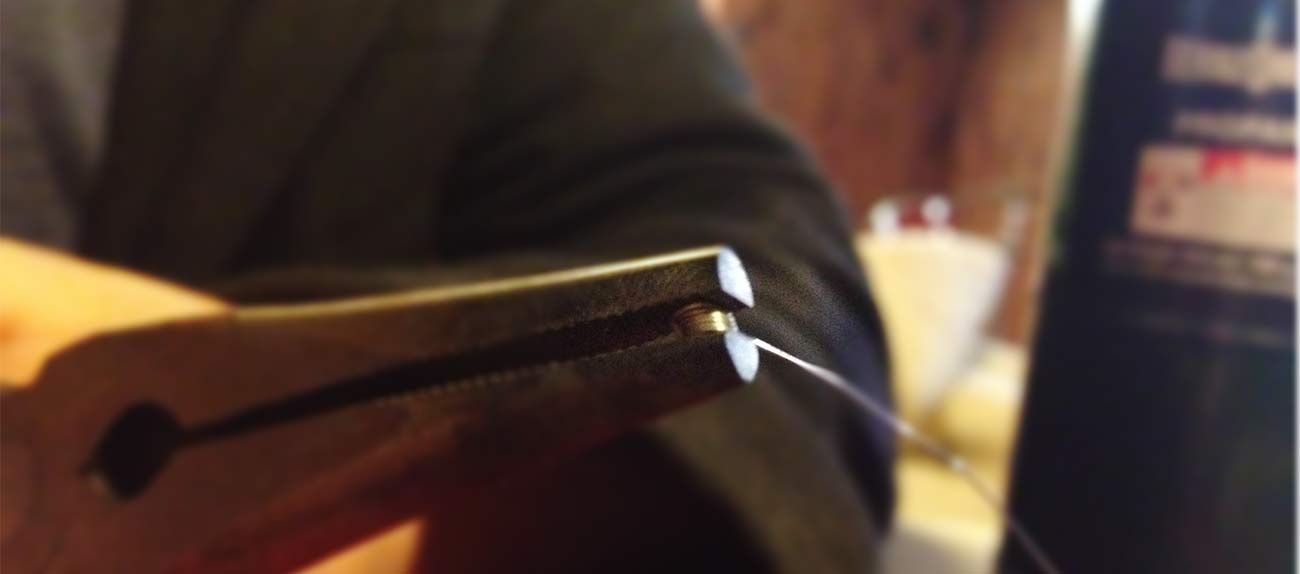 Pinch the resistance coil between the pliers using a light amount of pressure.
Again, be gentle. You only need enough pressure to keep the coils touching. If you squeeze too hard coils might end up overlapping which can cause a short when you go to fire your build. A short is bad. If your coils overlap, put the coil back on the syringe or drill bit and do it over again.
-
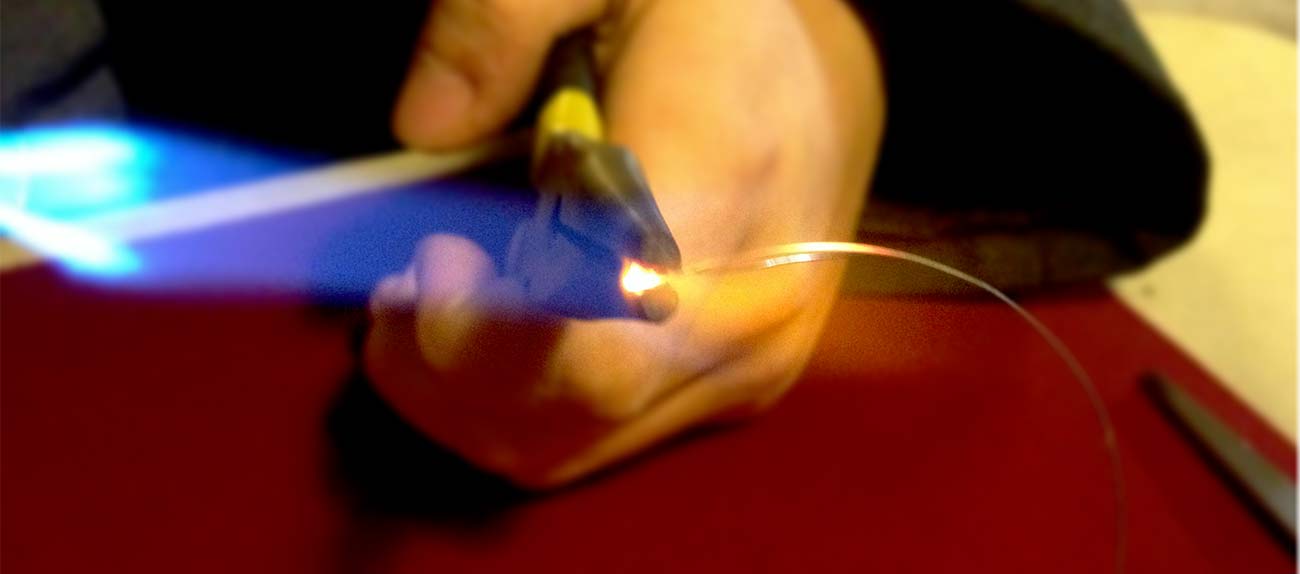 Use a butane or propane torch and heat the coil until it glows bright orange/red color.
You dont really need to over do this. As soon as it glows evenly and the color is bright, you can move onto the next step
-
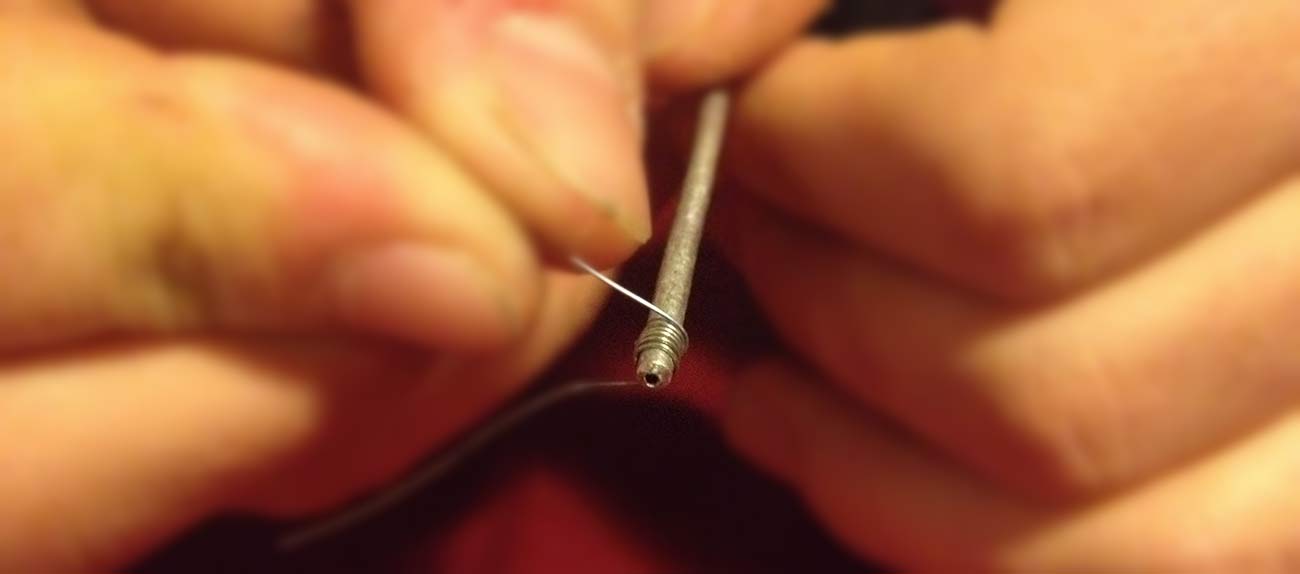
 Re-insert the drill bit or syringe tip into the coil.
This step is very important. Re-inserting the drill bit into the coil will provide stability to the build when you're attaching the leads to the posts of your E-Cig RBA.
-
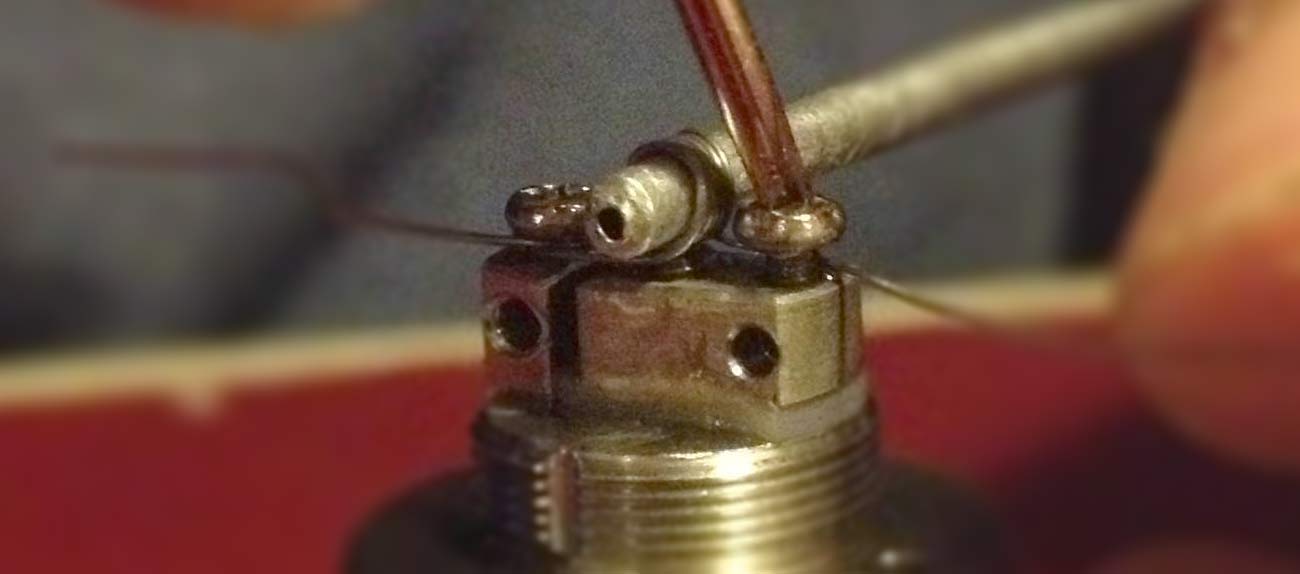 Mount the coil's positive and negative leads to the posts on your Rebuildable Atomizer and tighten the post screws.
With the coil still attached to the syringe tip; wrap one lead around the center post of your atomizer, tighten it, then wrap the other lead around a negative post on the build deck and tighten that down as well. Once you've done this, you can remove the syringe or drill bit from the coil. Just be careful that you dont cause the coil wraps to separate from each other.
-
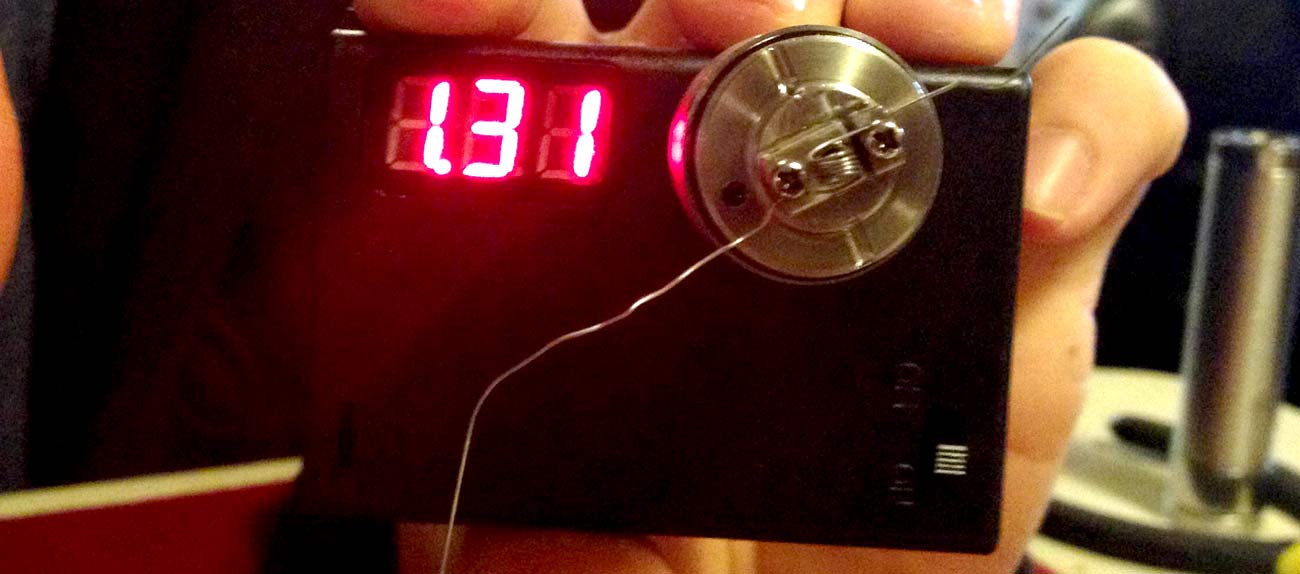 CHECK YOUR RESISTANCE!
This is a very important step. You need to check your resistance using a resistance checker. Most variable power devices have this functionality built in. You need to make sure that the resistance of your coil fits within the tolerance range for safe operation of your battery. You don't want to draw too many amps off of your battery and have it EXPLODE on you, do ya? 1.1ohm or higher is safe for most IMR batteries. Only use batteries with safe chemistries, such as the Sony US18650VTC3 or US18650VTC4.
-
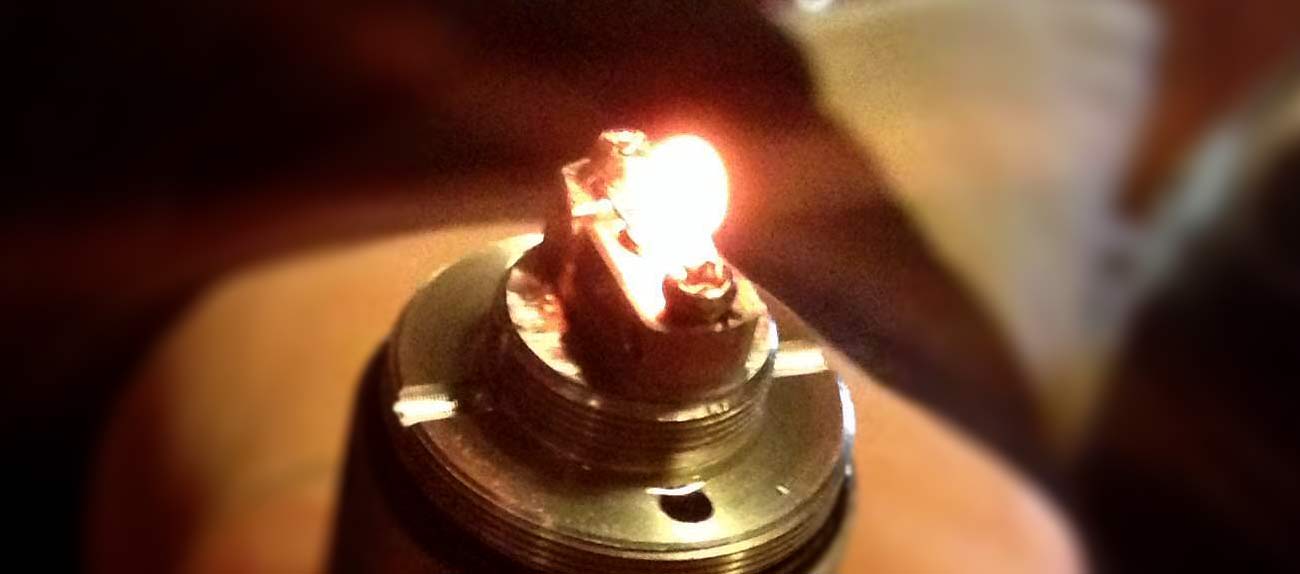 Attach your atomizer to your mod and "Dry fire" it to ensure that the coil glows evenly, from the center outward.
Dry firing is when you fire your e-cig mod without any liquid. This step is required in order to make sure that your coil isnt shorting and also that the coil is wrapped and heating evenly.
-
Pull off 2" length and about 1/3 width of an unrolled cotton ball.
Too much cotton is bad. Using too much cotton could choke out your coil resulting in dry hits. Too little is also bad. Using too little cotton can result in flooding in certain atomizers, and wicking issues in others.
-
Spin your organic cotton lightly on one end until you can fit it through the coil.
Spin one tip of your cotton enough to get it through your coil, then pull it through carefully as to not cause your coil to spread.
-
 Pull the wicking through until there is an even amount on either side of the coil.
Leaving more cotton on one side than the other can result in an inconsistent vape. There are some RBA's where there are exceptions to this, but for the most part you want to make sure that you have even cotton in length and thickness on both sides. When it comes to rebuilding atomizer coils, the more beautiful the build looks — the better it is likely to perform.
-
 Trim the wick to the length required by its individual build needs (learn more on youtube).
Certain builds require different amounts of cotton on either side of the coil. If you're using the Kayfun 3.1, pull the cotton through the chimney, screw the chimney down and trim the cotton to the top of the chimney, then lightly tuck the cotton into either side of your build.
-
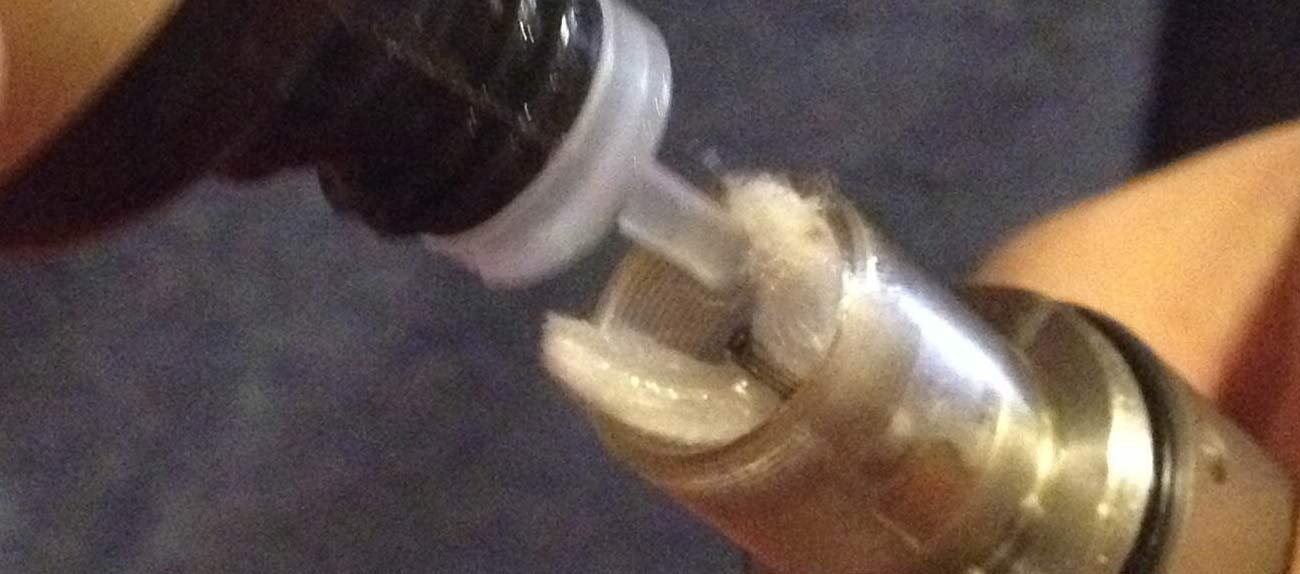 Prime the wick with some of The Best E-Liquid in Connecticut.
Put some juice on your wicking material until it is completely soaked with juice. Don't over do this, but the entire surface area of your wicking material should be coated with e-juice.
-
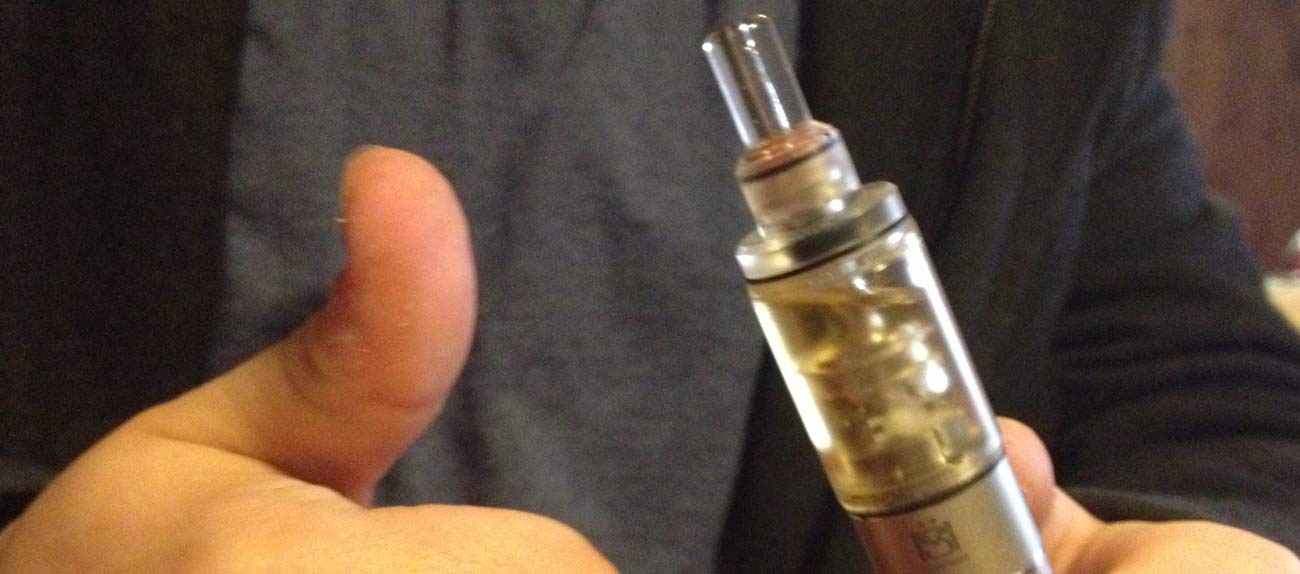 Reassemble your RBA
Put your RBA back together by reversing the process you used to take it apart. :)
-
VAPE!
You did it! You are clearly the best.


 Attach your atomizer to your mod and "Dry fire" it to ensure that the coil glows evenly, from the center outward.


